Crystals are beautiful and fascinating structures found all around us — from sparkling gemstones to salt on your dinner table. Have you ever wondered how crystals grow? The good news is that you can grow your own crystals right at home using simple kitchen supplies and within just one day!
This hands-on experiment is a great way to learn about science, chemistry, and the natural process called crystallization. Plus, it’s a fun activity for kids, families, or anyone curious about how nature works.
What You’ll Need
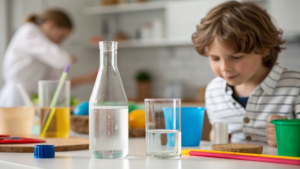
- 1 cup of hot water (ask an adult for help heating the water safely)
- 3 tablespoons of salt (table salt works fine, but you can also try sugar, baking soda, or borax for different types of crystals)
- A clear glass or jar (the clearer, the better so you can watch your crystals grow)
- A spoon for stirring
- Food coloring (optional, if you want colorful crystals)
- A piece of string, yarn, or a pipe cleaner
- A pencil or stick to suspend the string inside the jar
Step-by-Step Instructions
- Heat the water
Begin by heating about one cup of water until it is very warm or hot — but not boiling. You can heat water in a kettle, microwave, or on the stove. Be careful when handling hot water; ask an adult to help if you need. - Dissolve the salt
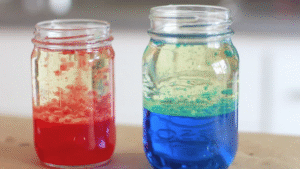
Pour the hot water into your clear jar or glass. Then add 3 tablespoons of salt (or sugar, baking soda, or borax) to the water. Stir slowly and steadily with your spoon until the salt dissolves. Keep adding a little bit more salt if it keeps dissolving, but don’t force it. When the water is “saturated,” it means no more salt can dissolve and some will settle at the bottom. - Add color (optional)
If you want your crystals to have color, add a few drops of food coloring and stir gently. - Prepare the string or pipe cleaner
Tie one end of the string or pipe cleaner to the middle of the pencil or stick. Make sure the string is long enough to hang into the water but does not touch the bottom or sides of the jar. - Suspend the string inside the jar
Lay the pencil across the top of the jar so that the string hangs freely into the saltwater solution. This gives the crystals a surface to start growing on. - Place the jar in a safe spot
Find a place where the jar can sit undisturbed for 24 hours or more. Avoid moving or shaking the jar, as this can disrupt crystal growth. - Watch the magic happen
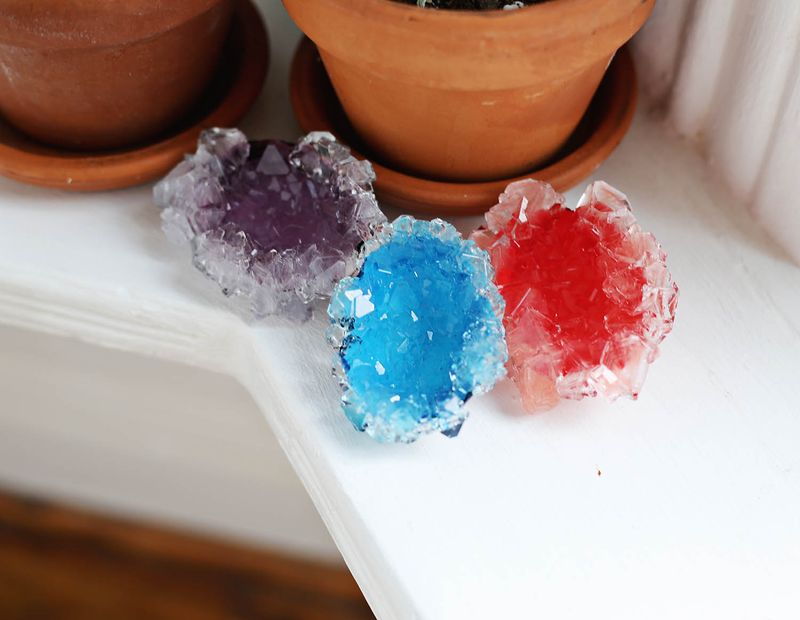
After a few hours, you should start to see small crystals forming on the string or pipe cleaner and the sides of the jar. By the next day, your crystals will have grown much larger!
What’s Happening? The Science Behind It
When salt dissolves in hot water, the water molecules separate and spread out, allowing the salt to break down into tiny particles called ions. Hot water can hold more dissolved salt than cold water.
As the solution cools down, the water can’t hold as much salt anymore, so the salt ions begin to come back together, forming solid crystals. The string or pipe cleaner acts as a seed where the salt ions gather and attach themselves. Over time, these tiny crystals grow bigger and bigger, creating the sparkly formations you see.
This process is called crystallization, and it’s the same way natural crystals like quartz, diamonds, and even snowflakes are formed over time in nature.
Tips for Better Crystals
- Use very clean jars and materials to help crystals form evenly and smoothly.
- Try different materials (salt, sugar, borax, or baking soda) and compare the types of crystals you get.
- Be patient! Some crystals grow faster than others depending on the material and conditions.
- For bigger crystals, leave the solution undisturbed for several days or even a week.
- Experiment with shapes! Try shaping the pipe cleaner into a heart, star, or spiral for fun crystal designs.
Safety Notes
- This experiment is for educational and decorative purposes only. Do not eat the crystals, especially if you use borax, which can be toxic.
- Always wash your hands after handling the materials and crystals.
- Keep small parts away from very young children to avoid choking hazards.
What Can You Learn From This Experiment?
Growing your own crystals helps you understand important scientific ideas:
- Solutions and saturation: How much of a substance can dissolve in a liquid.
- Crystallization: How solids form from a solution as it cools or evaporates.
- Molecular structure: Why crystals form certain shapes due to the way their molecules arrange.
It’s also a fun introduction to chemistry and earth science!
Final Thoughts
Growing crystals at home is a simple but amazing experiment that shows how beautiful science can be. Watching your crystals grow teaches patience, observation skills, and curiosity — key parts of learning and discovery.
So grab your supplies, pick your favorite material, and start your own crystal garden today. Who knows? Maybe one day you’ll discover new kinds of crystals in nature or even create something amazing in a real lab!